Configure & Deploy AgentCore
Getting Started with AgentCore Configure
First, push your local code to AWS AgentCore using the command:
agentcore configure -e ./{your_python_file.py}
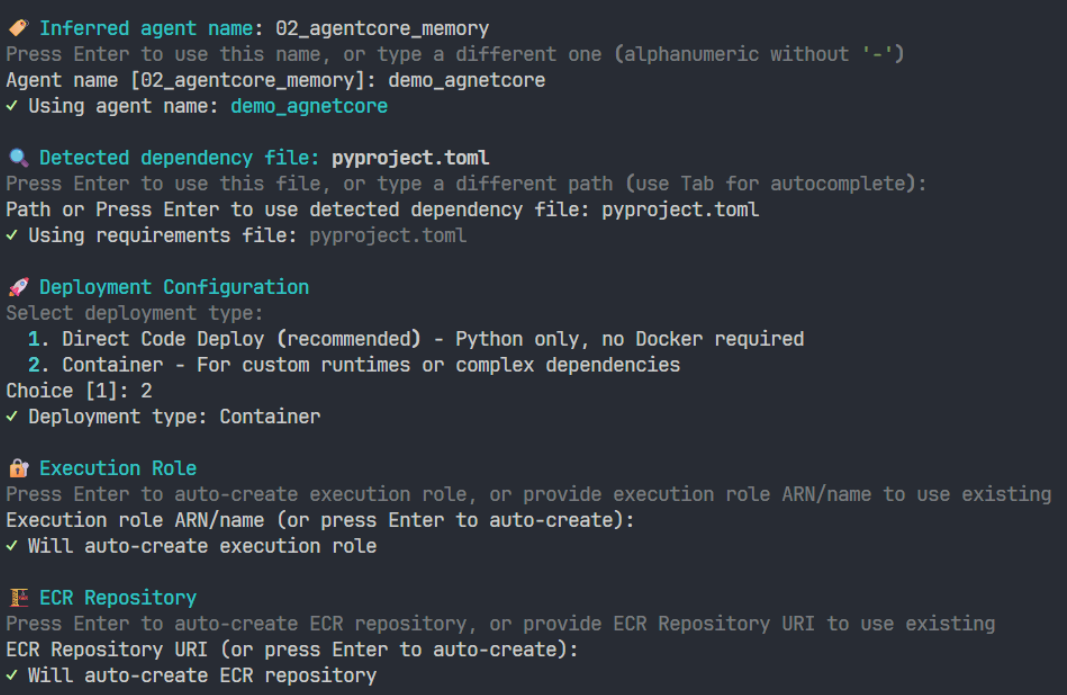
1. Agent Name
Enter a name for your Agent.
2. Configuration File
Press Enter to use the default configuration file pyproject.toml.
3. Deployment Configuration
Select 2 – Deploy using Docker, allowing AgentCore to automatically build and manage your Docker image.
4. Execution Role
Keep the default setting and let AWS create the IAM Role automatically.
5. ECR Repository
Press Enter to let AWS create the ECR repository for storing the Docker image.
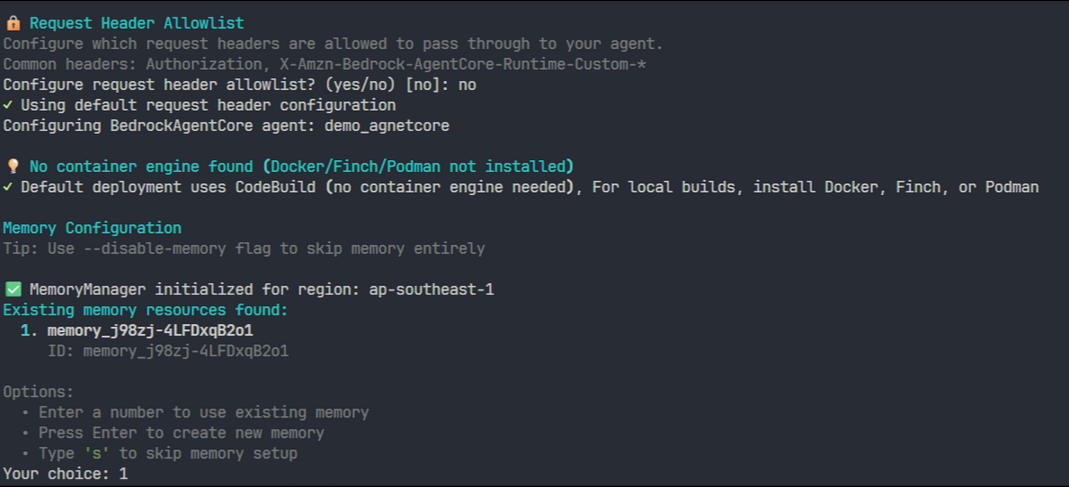
6. Authorization Configuration
Choose No for OAuth. The Agent will only allow access via AWS IAM Access Key & Secret Key.
7. Request Header Allowlist
Press Enter to use the default allowlist configuration.
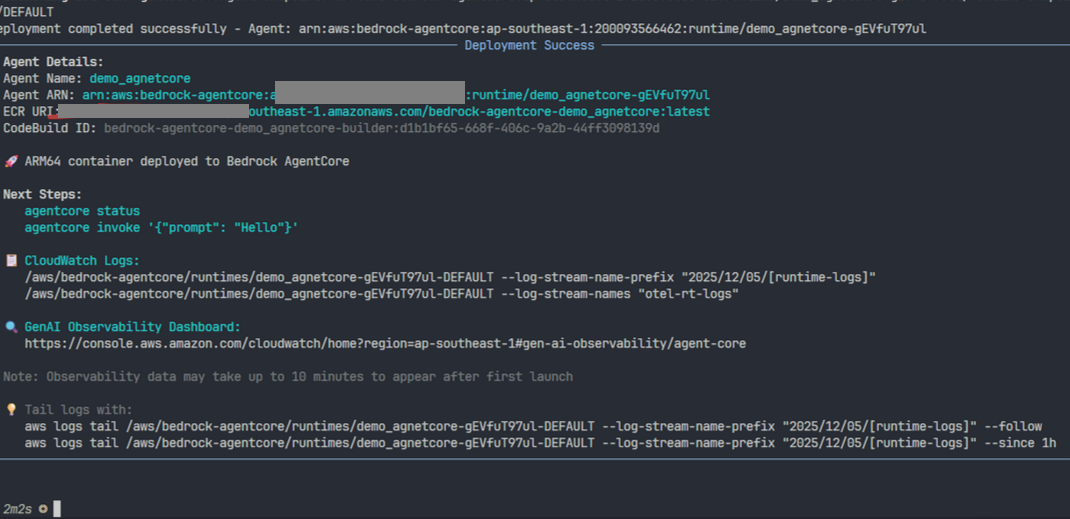
Result
Once this step is completed, your code has been successfully uploaded to AgentCore.
Launch the Agent
Use the command below to start the Agent with your API Key (using GROQ):
agentcore launch --env GROQ_API_KEY=your_api_key_here
When the terminal shows Running, your Agent is successfully running.